Motion Sensing LED Hallway
Motion Sensing LED Hallway
- Last Updated: December 2, 2024
Robert Boscacci
- Last Updated: December 2, 2024

Tl;dr: I covered the perimeter of my apartment hallway in fancy LED strips. I installed motion sensors above all the doorways. I wrote a bunch of Arduino code. Now when you trip one of the motion sensors, the hallway lights up from that point outward, creating a “runway” effect. This is how.
Begin Project Log (2019-04-10)
A few weeks ago I took an intro to Arduino class at my local hackerspace, NYC Resistor, and got inspired!
I’d like to install motion sensors and smart LED strips in our apartment’s entrance hallway. I’ll make them do a runway/chase effect, where the lights spark up sequentially (outward) in both directions, from the location at which the motion sensor is tripped. There could also be a button that forces the lights to stay on indefinitely, like…a light switch! And a way to change colors.

Here’s our entrance hallway today, with ugly glaring “boob light” visible:
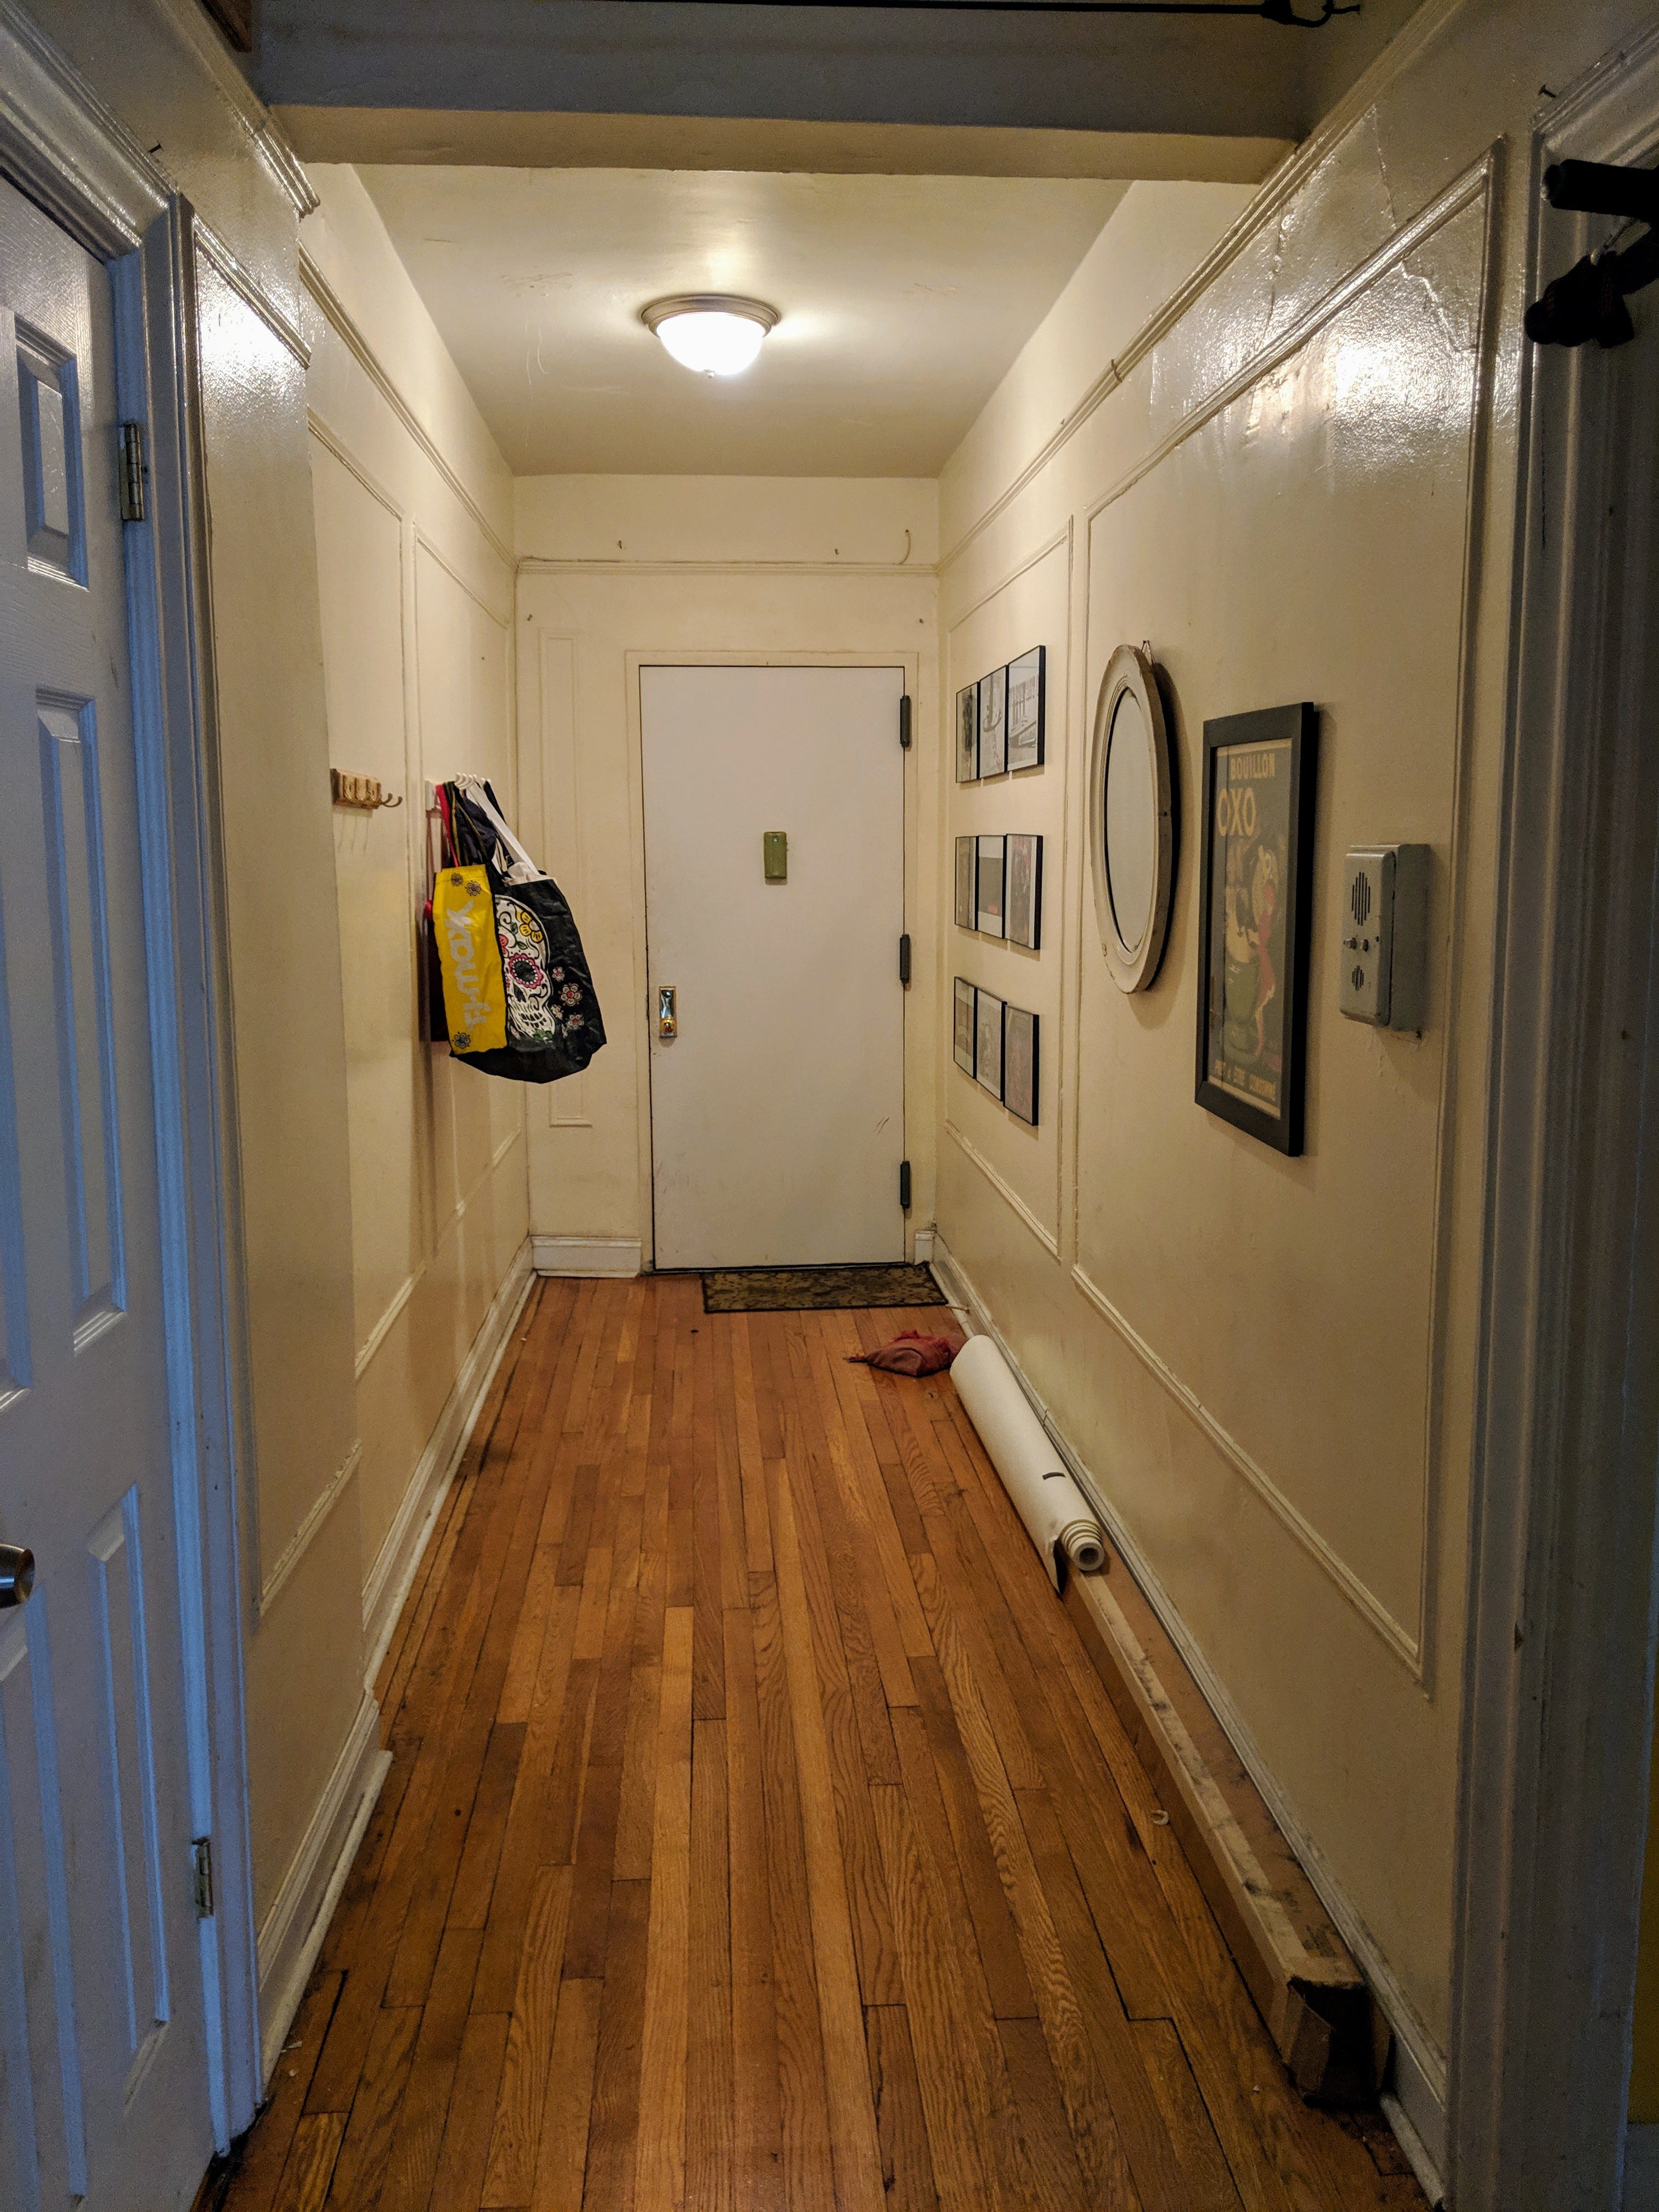
Boring “before” with ceiling boob light
I haven’t seen anything on Instructables quite like what I’m envisioning. This is the most similar precursor example that I could find, and it’s an educational one, but it’s a stairway (not a hallway), with many separate LED strips. Here’s the video demonstration:
Similar to my idea, but with stairs
This stairway is a really helpful example, and I think I’ll end up using a lot of the same parts. But my setup will be sort of different.
Below is an example with longer LED strips (more like the kind I want to use) lining a hallway, but there’s no “animation” other than fading all LED’s together from 0 to 100% brightness upon tripping the sensors:
While it works, I don’t think it’s the most elegant installation job. The under-glow lighting is also a little too sci-fi for the home, in my opinion; I’d put the strips by the ceiling, like normal home illumination.
Parts Brainstorm
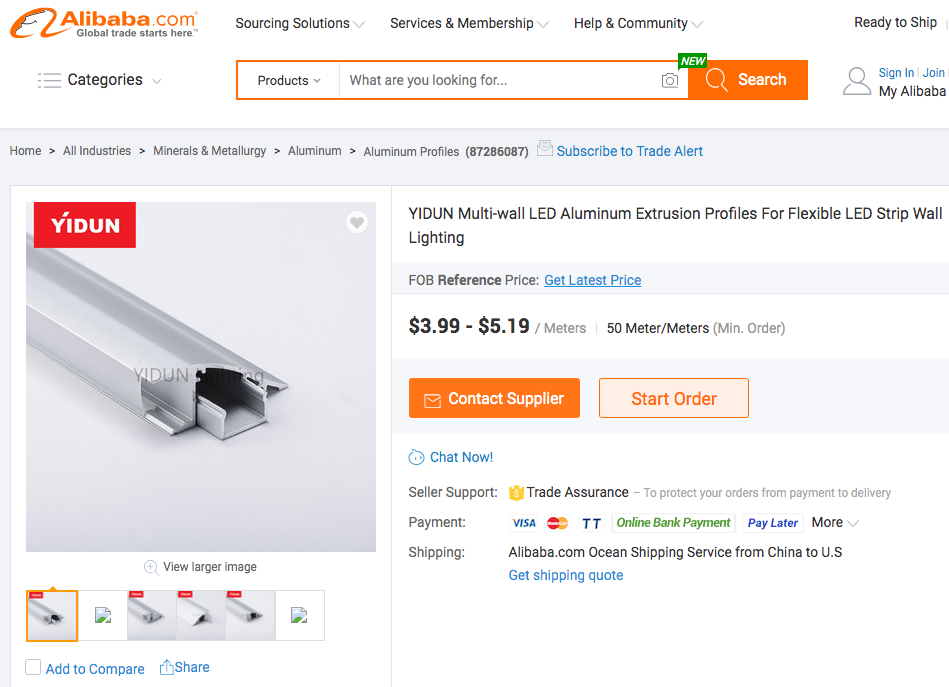
We’ll use some aesthetically pleasing hardware to diffuse light and hide ugly wiring, like this metal channel that my roommate Ryan found on Alibaba:
The previous video example also doesn’t take advantage of individually addressable LED strips, like the NeoPixel products that Adafruit offers:
AdaFruit NeoPixels
Addressable LED strips are the cat’s pajamas; the bee’s knees.
I need that pixel-level control. With NeoPixels, a super-long series of LED strips can be controlled from just one data pin on an Arduino board!
First Purchases
After some tabulating and scheming, I order these parts:
- [1x] Arduino Uno (actually mine is a “metro” from Adafruit, same thing)
- [5x] PIR motion sensors (Very cheap — Amazon)
- [2x] NeoPixel RGB LED strips [5-Meter, 30px/M]: ($$$$ — Adafruit)
- [150ft] Various colors 18AWG hookup wire, may need more ($$ Amazon)
- [1x] 5V, 20A Switching Power Supply. Ugly boxy kind ($$ Amazon)
- Wiring misc: Various jumper cables, headers, 1K-μF capacitors…
I hope I’ll be able to get these bits powered and communicating with each other, if only because those LED strips aren’t the cheapest. I took a 4-month data science boot camp recently, so I have some programming experience. Arduino code is more like C++ than Python. However, I know abysmally little about electrical engineering, which is sort of critical here. I guess I’m supposed to wire everything to a common ground or I’ll have weird sync issues.
I am using this guide on the Adafruit site to estimate the amperage I will need.
Concerns
- The long run of LED strips.
The two LED strips I just ordered are the longest ones available from the AdaFruit site at 5 meters each, and they recommend feeding each strip some power every meter or so. I don’t know how to physically do that while testing: Alligator clips? Implementation won’t be super easy for me. I tried to solder once before, it didn’t go well. Will the power and data cable run-lengths cause problems?
Adafruit strongly recommends buffering power to the NeoPixel LED strips with 1K-μF capacitors to prevent power blowouts on startup, so I picked up a 5-pack. Will I need one for every spot where I feed a strip power? Or just one capacitor for each power supply? Will I need more wire in general? Only time and testing will tell!
For now, I will just have to wait for my parts to arrive. Hopefully, if I bother them, the nice people at NYC Resistor or the Arduino parts shop in Manhattan (Tinkersphere) will lend some guidance while I break things.
Initial Tinkerings (2019-04-12)
Things have already begun to arrive!

First Shipment
Got some wires, LED strips, power supply; most of what I need. Adafruit is just across the East River, in Manhattan, which might explain how their stuff showed up just as quickly as the Amazon Prime deliveries.
The first roadblock I hadn’t anticipated is that the power supply I bought doesn’t come with an easy way to plug it into a wall outlet. This should have been obvious looking at photos of the product on Amazon. Oops. Luckily this is easy to remedy, given some loose 18awg wire and a spare Edison wall plug stolen from some other device. In my case I cannibalize a short 6" extension cord, keeping the male end, chopping off the female end, and hooking up the three wires accordingly to the PSU. I followed this video tutorial:
In a very janky breadboard/jumper cable fashion, I make the necessary data and power connections between the Arduino board, an LED strip, and the power supply. I load up some example code from the Neopixel Arduino library. With some small modifications to the code, I’m starting to see something like the chase effect I was imagining for the hallway!
For now, I have to use my imagination to picture a motion sensor located near the middle of the LED strip triggering all the lights to turn on in sequence from that point outward.
Very stoked on this small success! I wasn’t even sure I’d be able to get the strip to turn on, but here it is, lighting up, talking to my Arduino board, and generally showing lots of promise. No smell of burning electronics either. Big win for today.
Initial "User" Feedback (2019-04-13)
Roommate Ryan lends a hand while I demo the LED strip in the hallway, just to see how it might end up looking. Got some feedback from my first “user”:
- These five-meter 30-pixel/meter NeoPixels might not be bright enough to serve as practical home hallway illumination. I should order a handful of twice-as-bright, 5-meter, 60 pixel/meter strips (from Alibaba for the low low prices), return the other pricy NeoPixel strip, and continue to prototype with the other NeoPixel strip (which I have, in fact, already unboxed). I’m sure I can chop it up and repurpose it for some (wearable?) project(s) later. Adafruit seems like a good, American, female-led company that should keep at least some of my money. In tinkering, it seems like a good idea to keep surplus/scrap materials around.
- We could cover the entire perimeter of the hallway and set up one motion sensor for each entryway, so that no matter which way you’re entering, you get the chase effect dispersing from that point..! This is such a cool idea that I’m hesitant to accept it. PIR sensors are cheap enough, and I think I’ll have enough open data pins on the Arduino board to get it done, so why not?
I go on Alibaba and place an inquiry about some mega-cheap addressable LED strips:
<!-- wp:paragraph --> <p>These LED strips from Shenzhen seem similar enough to the Adafruit NeoPixels: Data, power, and ground connectors, similar purported brightness and capabilities. I wonder if iPixel’s QC is quite as rigorous as Adafruit’s though. Will karma f*ck me for undercutting the domestic economy? Only time will tell!</p> <!-- /wp:paragraph -->
<!-- wp:paragraph --> <p>I’ve never used Alibaba, so this is a sub-quest of its own. I guess it’s geared more towards bulk import/export trade deals, but I think I can buy just one meter of LED strip if I want…hoping to snag five meters, to blanket the entire perimeter of our hallway.</p> <!-- /wp:paragraph -->
<!-- wp:paragraph --> <p>Greater pixel density and greater lengths of LED strip mean I will also need more power. The PSU from my first round of purchases is only 20A, insufficient. The 70A version of the same PSU on Amazon isn’t too expensive and should work fine in tandem with the 20-amp one if I just tie together the grounds. 90 cumulative amps at 5V should cover 25 meters of 60 pixel-per-meter LED strip working at < 80% capacity, according to my rough calculations. I would just pick up one big fat power supply but it’s not as cheap as buying another to complement the one I already have.</p> <!-- /wp:paragraph -->
<!-- wp:separator --> <hr class=" />
Second-Round Purchases (2019-04-14)
Roomie Ryan set me straight and sent me to AliExpress instead of Alibaba; it’s way more consumer-centric and Amazon-ish than Baba. I just placed my second order:
- (5x) 5-meter Neopixel-like LED strips (“WS2812B”), 60 LEDs per meter. These were 1/4 the price of the Adafruit versions!
- 70A, 5v power supply from Amazon
- 6" Edison extension cables (to cannibalize for the PSU, and for my desk)
Now I have purchased 30 meters of smart LED strips, 1650 individual LEDs. I’m starting to feel the burn on the wallet, but I’m also learning a bunch, and I think it’ll be at least mildly satisfying when we have the entire perimeter of our hallway covered in LEDs providing a nice gentle glow.
Motion Sensors are a Go
Today I’m experimenting with the cheap PIR motion sensors for the first time. They’re pretty straightforward, you just plug power, ground, and data connectors into the Arduino board and code it to listen for signal spikes.
I borrowed code from this YouTuber’s site and combined it with what I had already stolen from the Adafruit NeoPixel Arduino library (seriously just copy-pasta with some small mods) to cobble together a little motion-sensor activated LED demo:
<!-- wp:paragraph --> <p>Much of the functionality I imagined when I started this project three days ago is already demonstrated in this .gif, albeit in janky prototype fashion and on a short run of LED strip. This pleases me greatly.</p> <!-- /wp:paragraph -->
<!-- wp:paragraph --> <p>One majorly positive discovery is that the PIR sensor can be on a pretty long data cable-run away from the controller board, seemingly without issues. I’ve also realized that at the brightness level I plan to set, these LED strips might not need power taps more than once every five meters. The true horror of the upcoming parallel DC wiring nightmare is yet to be determined.</p> <!-- /wp:paragraph -->
<!-- wp:paragraph --> <p>Ryan plops an inexpensive but new soldering kit on my desk. It’s great to have one of these at our disposal, but my first few soldering jobs will likely be ugly.</p> <!-- /wp:paragraph -->
<!-- wp:paragraph --> <p>It felt like I was building steam on this project over the weekend, but now I have a little less than a month to wait for these AliExpress deliveries, and I start my first ever tech job tomorrow, so progress will become more incremental from this point forward.</p> <!-- /wp:paragraph -->
<!-- wp:paragraph --> <p>Next step: Implementing a hardware <strong>switch </strong>or<strong> remote </strong>to toggle between color modes!</p> <!-- /wp:paragraph -->
<!-- wp:separator --> <hr class=" />
Learning to Solder (2019-05-04)
I just made my first ever (successful) solders! In an attempt to make a PIR sensor more compact and robust, I removed the boxy jumper cable ports and soldered some 18awg project wire straight in. It’s ugly but it worked.

Making the connections permanent is a necessary step in making the motion sensors production-ready. They still don’t look pretty, all bare-naked as pictured above; I will have to find some sort of cute enclosure to house them.
Switch and Button (2019-05-05)
I’m celebrating Cinco de Mayo with some shiny new purchases from Tinkersphere in Manhattan. I picked up a multimeter (great for hardware debugging), a spool of speaker wire (cheaper than a variety pack of project-wire), variously sized plastic project-boxes, some alligator clips, more jumper cables, and a small sense of community from buying local.

The folks at Tinkersphere recommended the round buttons/switches because then it’s easier to drill holes in the plastic to install them. I’ll set up the button to toggle between different color modes, and the switch will force the lights to stay on, like a normal light switch.
Memory Upgrade (2020-01-18)
Damn, this project has been sitting in boxes in the corner of my bedroom for half a year! My last progress was on 2019–05–05! What happened??
After the last project log entry, I hit a bug where I couldn’t get more than ~600 or so LEDs to cooperate, and it took half a year to clear my busy schedule enough to get back to debugging the LED strip project. Life is crazy.
I wondered if I was drawing too much power, but it turns out I was just running out of memory on the Arduino board — too many smart LEDs to control with an Arduino Uno. So I ordered the slightly larger Arduino Mega!
It’s not an elegant solution, but in this case, just adding more memory solved the problem quickly. After flashing the Mega with the same code I had running on the Uno, I was able to drive data to 1500 LEDs in series, powered in parallel DC.
I made this makeshift “wiring diagram,” also:

A “Wiring Diagram” — missing a resistor or two but otherwise pretty accurate
The next step will be to productionize and install this badbambino. I see lots of soldering in my future. We realized that the metal channels we bought provide no easy way to attach themselves to the wall (no convenient screw holes or anything), so that’s all going to be pretty custom and tedious drilling through metal.
Prototype Installation (2020-03-12)
This project has taken almost a full year now, but a “beta” version is up! It’s just ugly-mounted with roofing nails for now. No fancy metal channels yet.

Today I wired in a photoresistor to measure ambient brightness while the lights are off. Now the whole system adjusts brightness like your phone screen, getting brighter when it’s daytime and gentler when it’s nighttime. Now I won’t be blinded when I go to the bathroom in the middle of the night.
Here’s Catherine triggering the doorway motion sensor (there are 3 others):


She’s a witch!
It’s not aesthetically perfect yet, but it’s fully functional. The system needed power connections at least once every 5 meters to avoid color shift at ~70% brightness, which is where I’ve capped it in the Arduino code. Leaving it on at 100% brightness for long enough was giving me thermal issues with the power supply, AKA a fire hazard, so I’m playing it safe.
The next steps will be hardware prettification: Hiding wires and exposed LED strips in those fancy metal channels and making it all feel more permanent.
The Most Comprehensive IoT Newsletter for Enterprises
Showcasing the highest-quality content, resources, news, and insights from the world of the Internet of Things. Subscribe to remain informed and up-to-date.
New Podcast Episode

IoT Is Finally Delivering
Related Articles