Prototyping a Smart Office IoT System with a BME 280 Sensor
Prototyping a Smart Office IoT System with a BME 280 Sensor
- Last Updated: December 2, 2024
Eric Zhang
- Last Updated: December 2, 2024

Rapid prototyping is a critical aspect of product development—especially in technology where end-to-end solutions may cost hundreds of hours of work by highly skilled experts in multiple fields. For applications in the "internet of things" (IoT), rapid prototyping demonstrates both the feasibility and the added value of a given solution in a clear and direct way. This post is the first installment in a series of posts about how to rapid prototype simple, useful IoT systems. Let's begin by prototyping a smart office IoT system (minimal technical skills required).
Most enterprise IoT systems adhere to the following path:
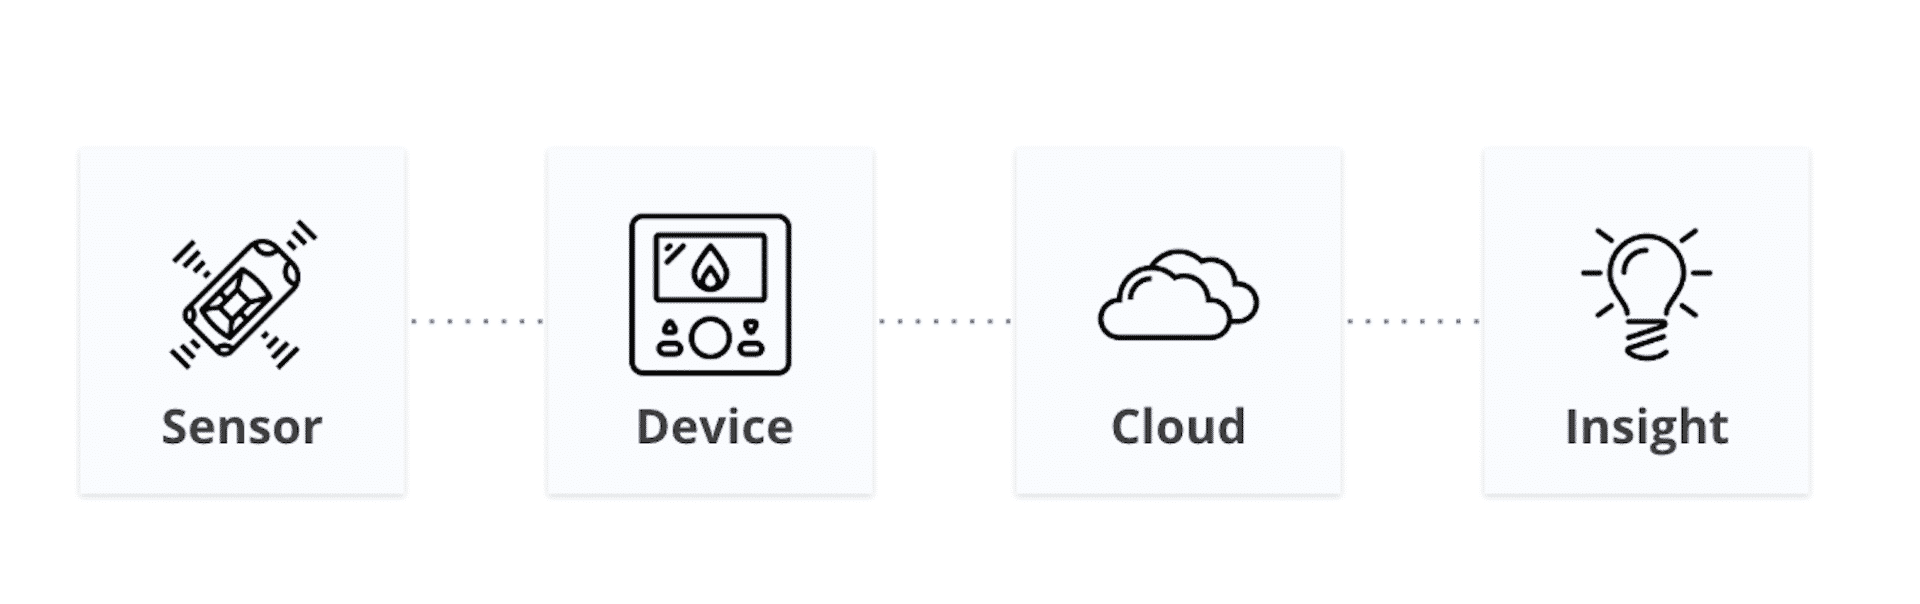
Image Credit: Leverege
However, the path to building a demo for these systems isn’t nearly as clear-cut. To make doing so easier, I’ll be walking through how to make your IoT ideas a reality in plain English—in other words, without you needing to have a technical background.
[bctt tweet="'#RapidPrototyping is a critical aspect of product development—especially in technology where end-to-end solutions may cost hundreds of manhours. || #IoTforAll #BME280 #rapidprototyping @ericisbored'" username="iotforall"]
Prototyping a Smart Office System
Problem: Indoor workspaces are poorly optimized for comfort. Whether it’s the heat, the cold, dry winter air or damp summer humidity, we humans can be susceptible to small changes in our environment.
Solution: A Slackbot that messages the office if conditions are "uncomfortable" using real-time sensor data transmitted via the cloud.
Components and Supplies:
- 1 x Breadboard
Components Explained:
Particle Photon—Particle is a hardware IoT platform with built-in integrations for GCP, Azure, IFTTT, and others. It also includes a device console you can use to monitor sensor data in real time.
Adafruit BME 280 Sensor—This module has multiple sensors built into a single module, including temperature and humidity sensors. It also has plenty of documentation and example code should you want to explore it further with Arduino.
IFTTT (If This Then That)—IFTTT is a free web-based service that can be used to integrate your services and applications to create custom “applets.”
System Diagram:
For this project, we will be following the "[Sensor] - [Device] - [Cloud] - [Insight]" model (diagrammed above) to build out the following IoT system:
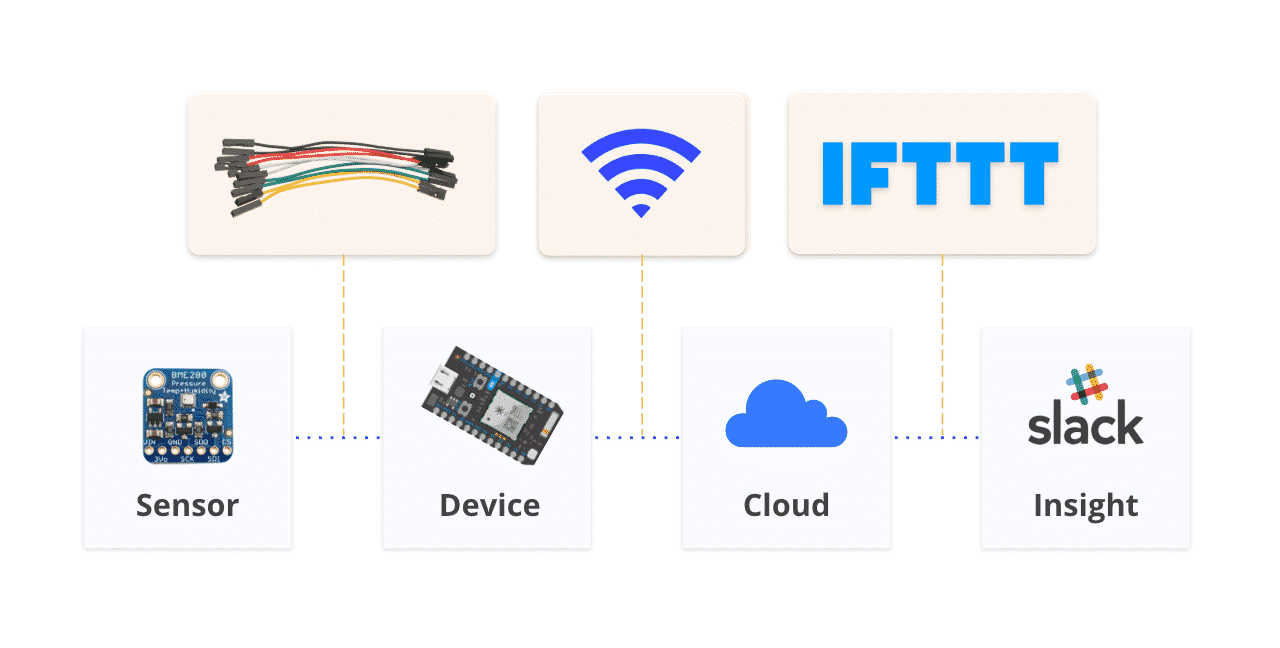
Image Credit: Leverege
Step 1: Connect Particle Photon to WiFi
Follow the steps listed on Particle’s website to connect your Photon to the internet via either the web app or the mobile app. Once finished, the light on your Photon should start pulsing a cyan-blue, which indicates that your device has successfully connected to the internet.
If your board is not pulsing cyan-blue, refer to this guide for troubleshooting.
Step 2: Wire Everything Up
Next, you’ll need to connect the BME 280 sensor to your Photon board. For more information on this sensor and its pinouts, refer to Adafruit’s documentation here.
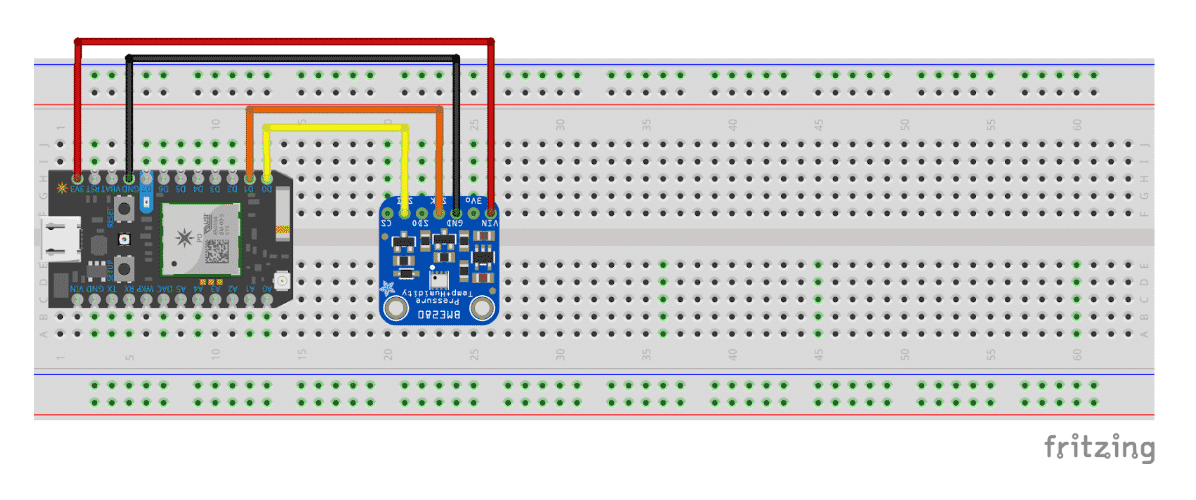
Image Credit: Leverege
Step 3: Flash Your Code
Before you can start looking at your data, you need some code. But don't worry! I’ve written up all of the code you'll need for this project here.
Next, navigate to build.particle.io. Log-in with your Particle credentials.
- Copy and paste the code from "photon-bme280.ino", found on the GitHub repo linked above, into the Particle builder.
- Navigate to the "Libraries" tab and make sure to include “Adafruit_BME280” in the project on particle.io.
- If you own multiple Particle boards, double check the bottom right corner to confirm that the device you’re flashing is correct.
- Hit the lightning button at the top to flash the code from the builder onto the Photon board.
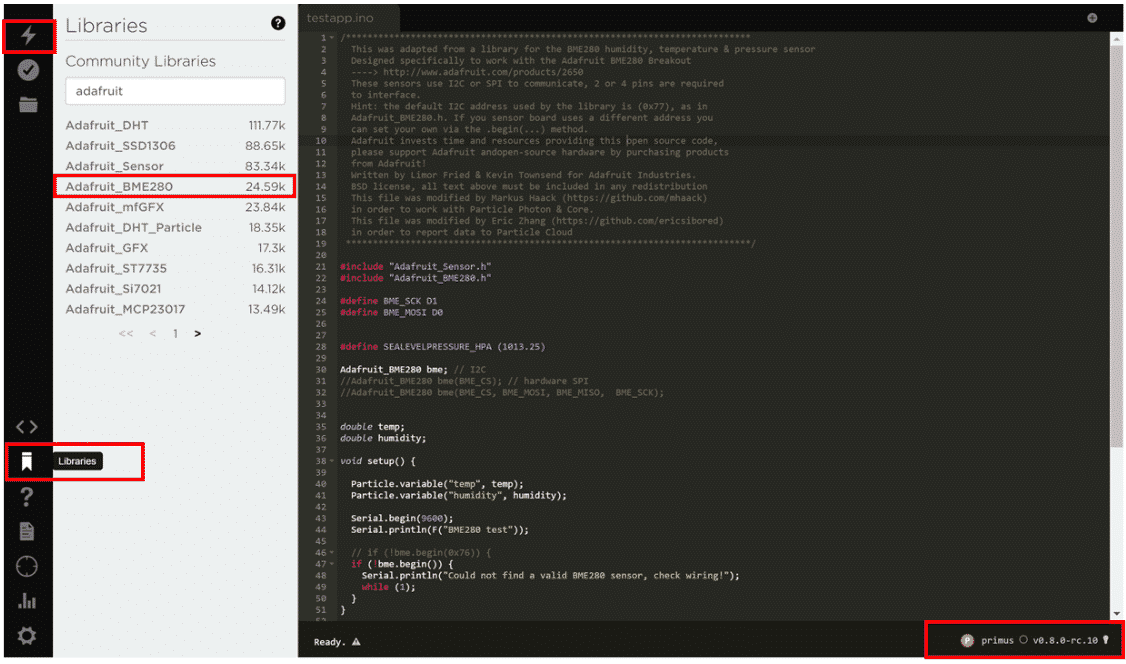
Image Credit: Leverege
If everything went well, your Particle Console should look something like this:
Image Credit: Leverege
Troubleshooting: If your dashboard doesn't seem right, go back through the steps, moving the code from the place I linked above into the Particle IDE. If you're still struggling, please leave a comment on this post with a description of your issue so that other readers (and I) can help you.
Step 4: Create integrations with IFTTT
Finally, we will be using IFTTT to publish sensor data from Particle to Slack.

Image Credit: Leverege
Create an account with IFTTT, then navigate to https://ifttt.com/create where you can create custom applets for your office. In this example, we will be messaging our work Slack whenever our sensor detects specific environmental conditions.
In other words: If [temperature/humidity] is (greater than | less than) [threshold value], then [post to Slack channel].
After you’ve created your applet, it should start checking with your Photon roughly every minute and report back whenever a condition is met.
As a bonus, you can also check on office WiFi/power issues with the photon if you’d like to keep it running 24/7. Just change your “if this” to check for whether the Photon is connected, when connected to an outlet or battery, and set Slack messages to message when “disconnected.”
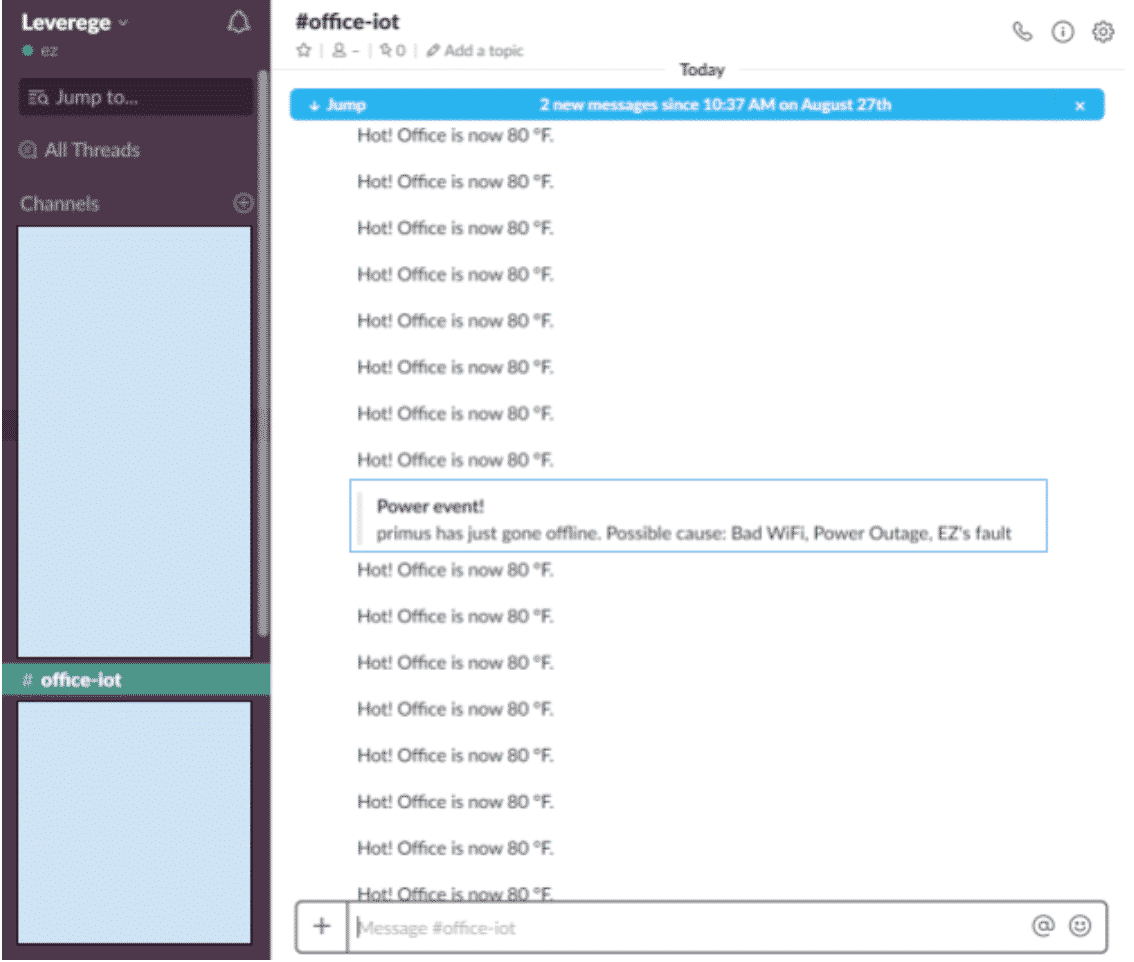
Image Credit: Leverege
If you’ve made it to this step, congratulations! You just built an IoT system! That wasn't so hard, was it? In this post, we learned about IoT by prototyping a smart office IoT system that reports office temperature via an internet-connected BME 280 sensor to you, using Slack.
And you don't have to stop here. If you’re feeling curious, just swap out your sensor (and code) or your IFTTT applet to explore other possible IoT scenarios quickly and cheaply. In a nutshell, that's rapid prototyping.
Our goal at IoT for All is precisely what the name suggests—to make IoT accessible for everyone regardless of their technical background. Stay tuned for future installments in this DIY IoT series.
The Most Comprehensive IoT Newsletter for Enterprises
Showcasing the highest-quality content, resources, news, and insights from the world of the Internet of Things. Subscribe to remain informed and up-to-date.
New Podcast Episode
IoT Is Finally Delivering
Related Articles


Related Solutions
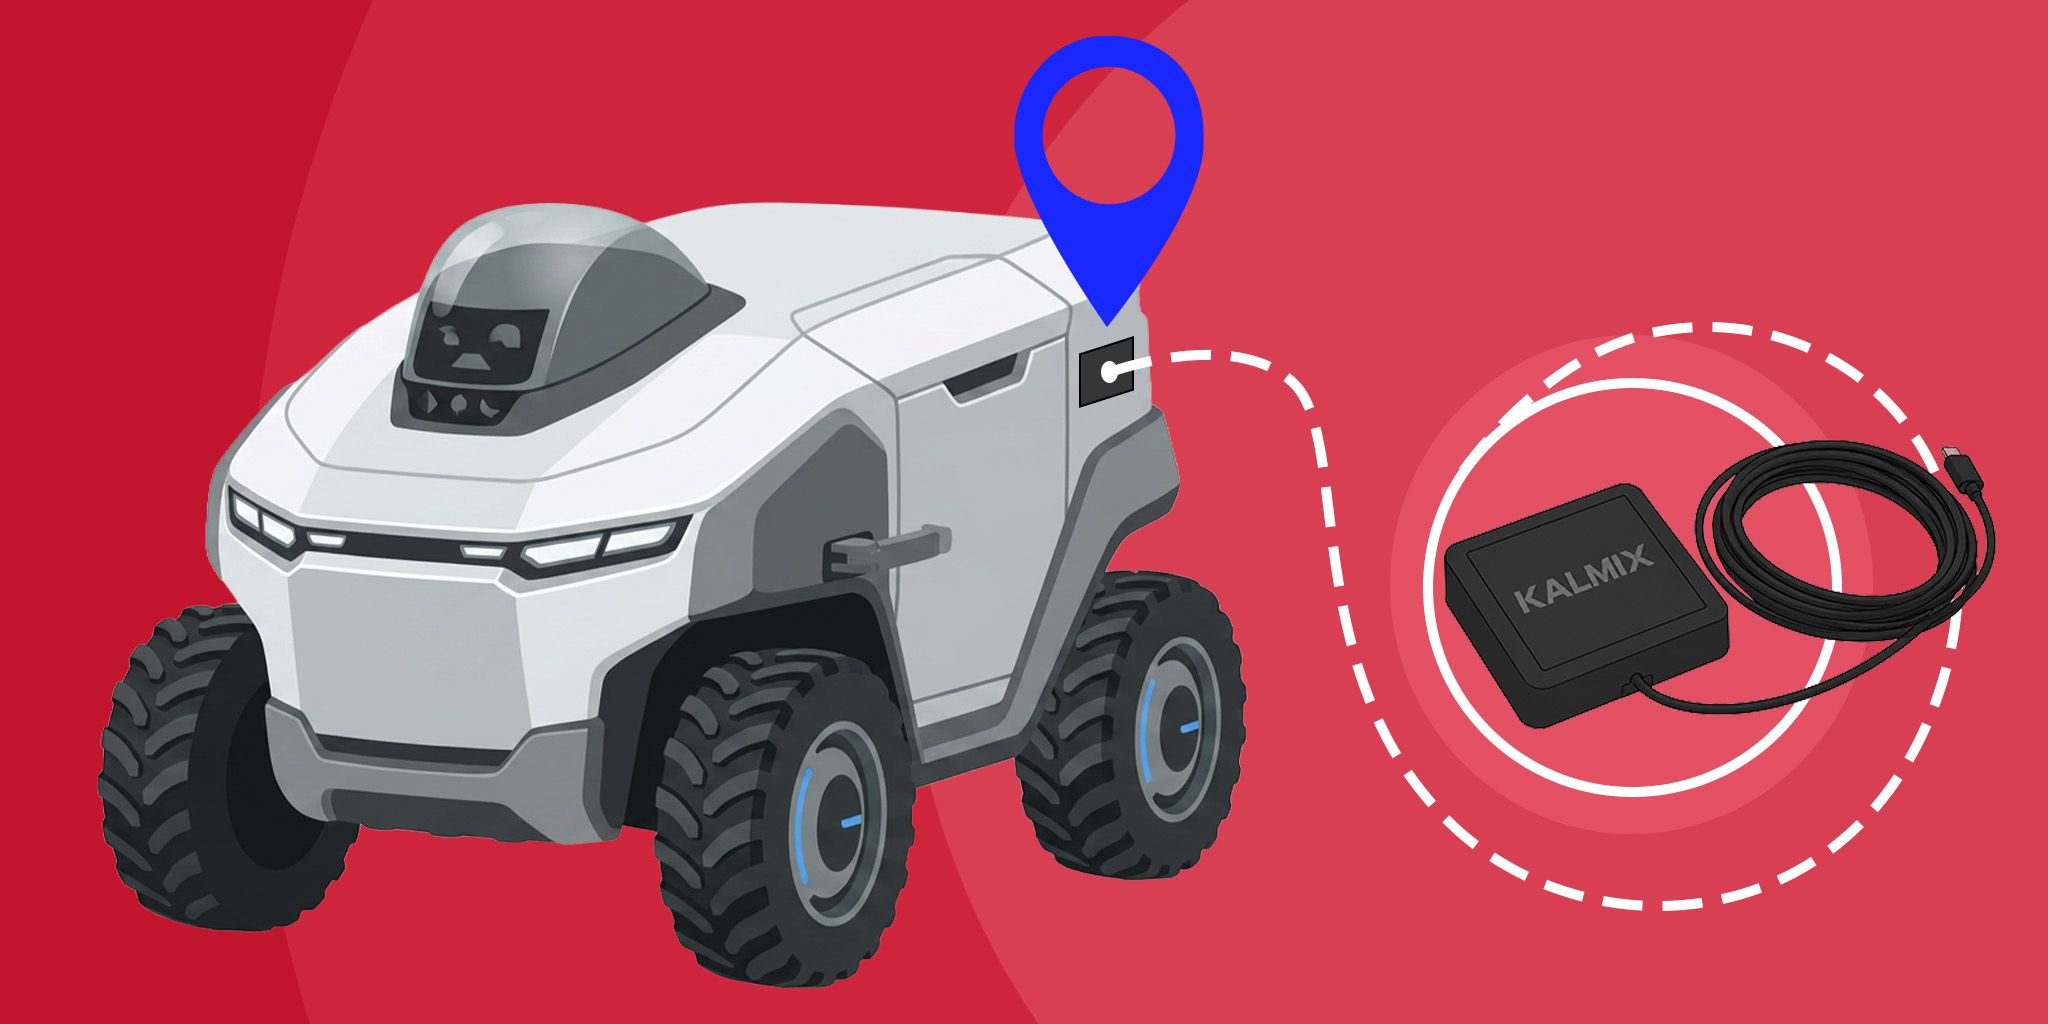
RTK Positioning for Robotics and Field Machines
High-precision positioning. Achieve centimeter-level accuracy without the complexity of building custom hardware from scratch.
High-precision positioning. Achieve centimeter-level accuracy without the complexity of building custom hardware from scratch.
Kalmix
Kalmix
Staff Management and Location Tracking for Coworking Spaces
Gain real-time visibility of third-party staff like security or janitors with BLE beacons and smart LTE badges.
Gain real-time visibility of third-party staff like security or janitors with BLE beacons and smart LTE badges.
Minew
Minew
Related Solutions
Industrial
RTK Positioning for Robotics and Field Machines
High-precision positioning. Achieve centimeter-level accuracy without the complexity of building custom hardware from scratch.
Kalmix
Buildings & Facilities
Staff Management and Location Tracking for Coworking Spaces
Gain real-time visibility of third-party staff like security or janitors with BLE beacons and smart LTE badges.
Minew